
My Ducati Scrambler Review – Urban Enduro

I had the chance to test ride one today. It was an Urban Enduro, which brought me back to the first bike I rode….a 1974 Kawasaki 175 2 stroke. It’s the spitting image of that bike, and just screamed of being the perfect retro\all-around daily commute\fun bike.

For reference, I currently commute on my KTM 350EXC-F Enduro, which also has seen its fair share of Harescramble action, as well as multi day dual sport trips. I rode the 350 to the dealer for my test ride. I wanted to really highlight to myself the “issues” I have with the 350 on the road. It has very little road manners. The slightest bit of wind pushes the bike all around, and despite being geared to the moon, the bike is still turning 63ooRPM @ 63MPH. Not only that, but it has the issue of every stop, it wants to ride along like I’m one of those 12 o’clock Boys in Baltimore.

So on to the actual test ride. Compared to my 2004 Ducati Multistrada (which had a 1000cc 2V motor with dry clutch), this 800cc Scrambler sounded so incredibly quiet. I love myself a beautiful exhaust, but on a daily ridden machine, I hate the idea of pissing of neighbors or traffic while I’m commuting. The bike quickly spurred to life, and walking to the left side of the machine, you immediately realize just how small this thing is. Yes, I had just hopped off my 37” seat height enduro, but I can’t stress how physically small the bike is. That’s ok though, because when you’re using a bike daily, you don’t want to screw with a tall bike thats a PITA to do quick maneuvers.

You’ll notice when you pull in the clutch that the action is incredibly soft. Thank God. I’m baffled by why the Italians install a hydraulic clutch on other bikes, and the clutch pull is like one of those hand toning spring things. The cable actuated clutch on the Scrambler is delicate, and although my test ride machine was set a bit off from how I prefer, it was a gentle pull, with a positive feedback from the lever as you released and felt the clutch engage.

Clicking into gear, yah, the trans is tight. The bike is new, and so that’s expected. If it feels any bit notchy, its likely a combo of new gears meshing together, and if you’re like me with size 13 boots, its you getting used to how the shifter is too short. Subsequent gear changes are plenty smooth, and with the torque of the 800cc L-Twin motor, each gear pulls long and hard (yes….that’s what she said).

Leaning into your first couple turns, you’ll notice again just how low the bike is. If you’re not careful with foot positioning, you’ll be dragging a toe before you know it. Not an issue, keep your toes (and eyes) up, and you’ll be through the turn before you know it. The bike has an nimble agility that is reminiscent of my old Kawasaki. It wants to drop into turns as you wish, yet under power, wants to just sweep you through and on into the next corner.

You’ll surely have read by now that the suspension on this bike is crap. While I can say that it is definitely not primo Ohlins or WP suspension, it is far from crap. The rear has a touch too much compression damping, and not enough rebound damping. That said, the bike I was on had less than 800 miles on it, so the suspension was so far from being “broken in” that its not worth fully commenting on. If you’re one of them anal types who believes the doofuses writing reviews all day….then yes, prepare to spend 1000-1500$ on new boingy things. For what the bike is….I just don’t think they’re needed.

From the suspension complaints to the dreaded “twitchy” throttle, this is one of the greatest internet mysteries to me.  I’ve ridden several Ducati bikes.  Yes, you can make the throttle feel twitchy.  Case in point, cruise around in 2nd gear around the 4000RPM mark.  Light throttle adjustments are going to make the bike feel jerky.  If this is a problem for you, click up to 4th gear, hell…go all the way to 5th or 6th, and like magic, the jerkiness goes away.  If someone can’t figure out how to be in the right gear, sorry that’s their problem.  Not a bikes*.

Seat position on the machine is…..just OK. For me at least. I’m 6’0”, with a 32” inseam. At stop lights, I can stand over the bike with several inches between my pants and the seat. This was an odd feeling for me, but again…I came off my KTM 350. Now I have this issue with all bike companies. They all feel the need to make these seats push you into the gas tank. Why? Why? Why? A flat seat would have been absolutely perfect on this bike, but again…that’s ok. The seat once you get used to it does keep you in relatively the same position at all times. It’d help if it weren’t slippery, but then your undies would be getting in a bunch (literally). A lot of folks will complain about the seat not being comfortable….they’re on crack. It’s comfortable…their ass just is NOT used to riding it, and much like the suspension, the foam needs time to break in. It’s like buying a 700$ pair of Italian Oxfords, and thinking they’re gonna fit better than OJ’s glove at his trial. Silly.

So why as my brother mentioned am I not sold on the bike? There are just too many other cheaper options out there that I think could turn my turbine. I’m a motorcycle enthusiast at heart. Through countless bikes over the years, I’ve found that when I’m out riding, I don’t care what I’m on, but purely that I’m out riding. I had hoped that the downright sexiness of the Scrambler would push me over the edge and out writing a check. Unfortunately it just didn’t. I’m still not sure how I feel about that either. If you’ve never ridden a Ducati bike, especially a 2V like this, take one for a test ride. There’s nothing to regret about it.
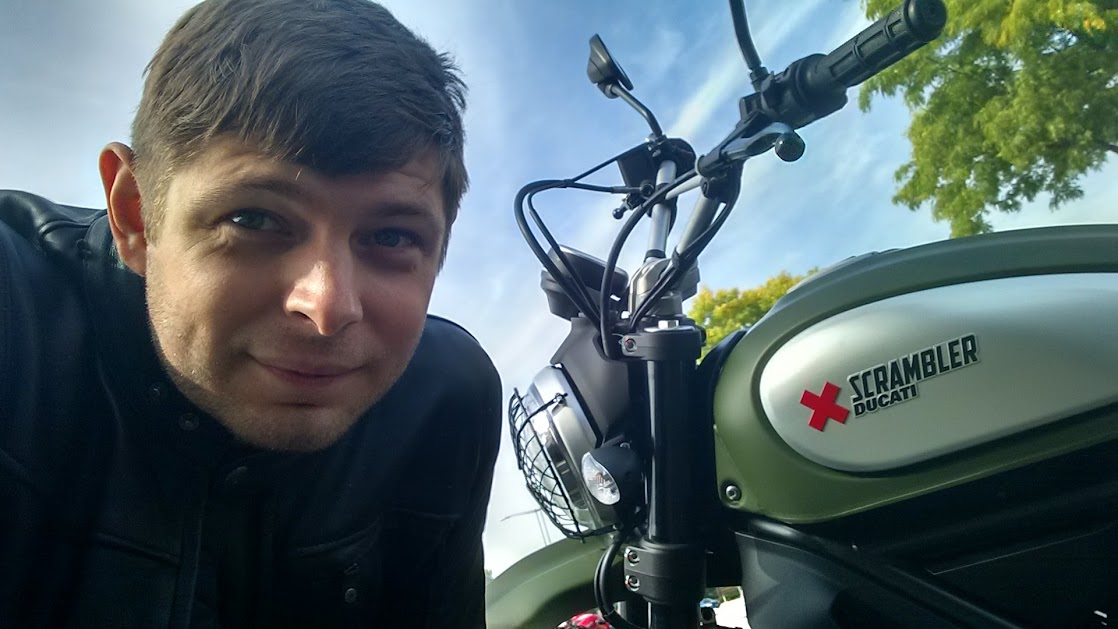
Andrew

*Yes, I’m aware of the lean spots that are built into bikes mappings to pass EPA Sound\Emissions requirements.  This is yet another reason for some jerky throttle, which again, is quickly remedied by changing gears.

Doocati For Sells

Some business reasons are prompting me to sell one of my machines to free some capital.  I purchased this bike last year and don’t want to sell it, but at times, there are more important things in life.  This time is one of them.  Here is the info on it:

2004 Multistrada 1000DS

34,xxx miles

Heads completely redone this past winter.  New Valves, Guides, re-shimmed, etc.  Millennium Technologies did the work.  They recut the seats to match the Kibblewhite Valves.  Kibblewhite Guides were used as well.  New Athena\OEM Seals were used throughout the top end rebuild.

Belts were replaced at the end of last season, and reused when I reassembled everything this past winter.

I inspected each cylinder bore, as well as pistons & rings.  Everything was well within spec.  If they were not, I would have replaced them.  The engine looked phenomenal on the inside.

Chain & Sprockets are new.  Sprockets are JT with the rear being a JT “quick release” hub.  Making sprocket changes quicker\easier.

The bike has an Arrow exhaust header.  Basically no more Catalytic converter.  The actual muffler part is still OEM.

I installed fresh rear brake pads as well this winter.  EBC HH pads, though apparently Ducati’s are known for mediocre rear brakes.

The bike has heated grips installed underneath some Pro-Grips.

I have also flashed the ECU with the Ducati Performance Map and have also disabled the Immobilizer.  The DP Map is phenomenal.  Fuel mileage suffers slightly, but the low speed throttle is so worth it.  I can flash the OEM Map back on if you want. I’ll give you all the tools to mess with everything as well.  There’s a couple harnesses, plugs, software, etc.  I’ve got it all and have it all documented for simplicity (I made sure to cover my basis….didn’t want to fry my ECU haha).

Outside of that, the bike is bone stock.  I love it.  I love riding it.  I love the power delivery.  The engine pulses make my insides melt with each increasing RPM.  The exhaust tone is pure symphony.  From 6,000-8500 rpm is just absolutely glorious.

The bike has complete Ducati Performance luggage.  I have all the keys for the luggage.  I have all the keys and original owners manual for the bike as well.  As noted above, I also have the software to flash the ECU as well as all the required cables & such.

I have a few custom tools that I built for the bike.  Tools for adjusting valves, loosening hardware, etc.

Not shown in most of the pics is the carbon fibre chin spoiler.  I didn’t like the look of it.  I still have it & it will be included with the sale.

That’s about all I can say on it at this point.  It’s not a perfect bike, but the key thing (heads\guides\valves) were all redone this past winter.  The tires probably have about 50% on them.  I was on the bubble of putting on some TKC80’s, but the bike is far more appropriate on the street (not that I haven’t hit a gravel road or two on it).

If you have any questions on it, let me know.  I just want to move the bike quick as noted above, I need the cashes more than I need this 2nd bike.

I was anxious a few weeks ago and took the bike out on a barely warm enough day:

Some of the tools I made during the rebuild:

(Left to right – Cam Pulley holder, Crank turning tool for adjusting valves, Cam holding screw to keep cam at TDC while adjusting\changing belts, Head Bolt Torquing tool, Opener valve holding tool, Cam Pulley Nut tool)

Motor during rebuild:

Head with new valves & guides:

It’s a sexy motor:

Your adventure awaits:


I’m in Northern Illinois.  Basically Southern Wisconsin.  Hour North of Chicago & an Hour South of Milwaukee.  Zip Code – 60081

Price: $4500 obo

Questions? Comments? Additional Pictures to follow (I know people want closeups….)

Andrew


Moab 2015 Trip Planning

I’ll be going to Moab this spring.  I’ve assembled a few GPS Routes, Tracks, Etc from a variety of sources.

GPX File here: MOAB-2015 (Right Click & Save As)

Mapset I’m using in Garmin Basecamp: http://www.gpsfiledepot.com/maps/view/701/

I found most of the tracks\trails @ Trail Damage here: http://www.traildamage.com/index.php

5 Miles of Hell info here: http://www.dirtbikeutah.net/five-miles-of-hell.html

That’s about all I have at this point.  I’ll be camping & on my 2013 KTM 350 EXC-F


Andrew

Klim Scramble Pak Tool Pack

After years of use and abuse, my Moose Tool Pack (ok fanny pack) has finally given up the ghost.  Out on the market are a couple options.  Ogio, KTM, Fox, Klim, etc all have their Tool Pack offerings, but Klim has always seemed to be the dependable choice with moto related gear.  I had no idea what the insides really looked like, so I took a bit of a gamble, so hopefully what I show here and on my video can give you an idea as to what you’re getting into.

The Klim Scramble Pak has 3 main sections.  The large center section and the two side sections.  The two side sections are identical to each other and are not much more than an empty space.  The main compartment is split up into several compartments.  Unclip the two side clips and first you’ll see the outer pouch.  This opening is about 6″ wide with enough room to fit your latex gloves or a couple rags, or maybe a few zip ties and odds and ends.

Flipping the top open, there is a large YKK zipper to access the main compartment.  These zippers like all on the pack have a mild cover to them to help keep out the elements.  Once the compartment is opened, you see your assorted slots, zip compartments, and elastic to keep your tools and gear in place.  There is a big clear pouch which would likely be ideal for a phone, or whatever you may want a quick view at.  One strip of the retention straps has a nice rubberized grip to it to help keep tools in place.

The side pouches themselves as noted earlier are primarily empty spaces.  The outside wall of them is soft like that of a sunglass pouch.  This outer wall also has a small elastic pouch to it.  Both sides are identical and have YKK covered zippers on them.

The main buckle is a solid unit with a very strong hold to it.  At the base of the pack there is a rubberized gripper to help keep the pack from rotating around your body while you’re riding.  The padding on the inside of the pack seems to be plenty adequate and thick enough to keep tools from poking through the pack, without being too thick as to be bulky.

All in all, initial impression of the pack are very solid.  I’ll be loading the pack up for some upcoming events and will do a year end review with it at the end of the season.

For full Hi-Res pics check below:

Acerbis 4.1 Gallon Gas Tank – For KTM 250/350/450/500

I wanted an oversized tank for my KTM 350EXC-F for some dual-sport rides.  I did not want to be the Exxon Valdez super tanker.  Enter the Acerbis 4.1 Gallon Gas Tank.  This tank replaces the OEM radiator guards without adding too much width over the OEM Tank.  This Acerbis unit is identical to the KTM Hard Parts 13L tank, but with the Acerbis screw on gas cap.  I opted for the Acerbis unit purely because it saved me about 80-100$ depending on where you purchase from.

Installing the unit is straight forward.  Remove your OEM Tank, Remove the fuel pump from your OEM Tank (not needed if you have a second fuel pump setup), slide fuel pump into Acerbis tank, and finally reinstall the tank onto the bike.  The Acerbis unit included all the required hardware for installing the tank.  The tanks wall thickness is thinner than the OEM tank, so this requires some alternate hardware.  The supplied hardware did the job and is on par or above OEM quality.  No faults to be had here.

Between your knees, you end up with about 1/2″ of fuel tank extra on either side.  In the center, you end up with the standard Acerbis look of a slightly too tall fuel filler.  This is due to Acerbis needing to be able to fit their dry break fuel filler system.  Not the end of the world, but if you’re used to sliding up on your tank all the way up to the bars, you’re going to have a nut buster of a problem.

When on the bike you don’t really notice the tank all too much.  Yes it’s there, and yes there is a bit more fuel sloshing around, but there is no avoiding that with adding fuel.  So far I’m happy with it.  My only gripe at this point being that the gas cap breather hose nipple broke off before I even touched the tank.  Mildly frustrating, though luckily the tank is still usable without that.

– UPDATE –

I contacted Acerbis regarding the broken cap.  They’re sending me a replacement cap.  Excellent Service & Response.

Acerbis Part #:2367750147